Drawing Icons
If you’re looking to enhance your illustrations with icons, drawlib offers several methods to achieve this.
You can utilize the image() function by providing an icon image file of your choice.
Alternatively, you can use icon() along with dedicated Icon Modules for drawing icons directly.
Icon Modules
We’ve curated a selection of icons for your convenience, available in drawlib now.
icon_phosphor: Derived from Phosphor Icons (https://phosphoricons.com)
Each icon within these modules is defined as a function, allowing you to draw specific icons by simply calling their respective function. Let’s explore with examples:
 1from drawlib.apis import *
 2
 3width = 100
 4height = 50
 5config(width=width, height=height)
 6
 7x = width / 7
 8y = height / 2
 9icon_phosphor.airplane_taxiing(xy=(x, y), width=10)
10icon_phosphor.airplane_takeoff(xy=(x * 2, y), width=10)
11icon_phosphor.airplane_in_flight(xy=(x * 3, y), width=10)
12icon_phosphor.airplane_tilt(xy=(x * 4, y), width=10)
13icon_phosphor.airplane(xy=(x * 5, y), width=10, angle=270)
14text(xy=(x * 5, y - 10), text="angle 270")
15icon_phosphor.airplane_landing(xy=(x * 6, y), width=10)
16
17save()
All functions have these args.
xy: coordinatewidth: icon widthangle: angle 0.0~360.0style: Accepts string style name orIconStyleobject.
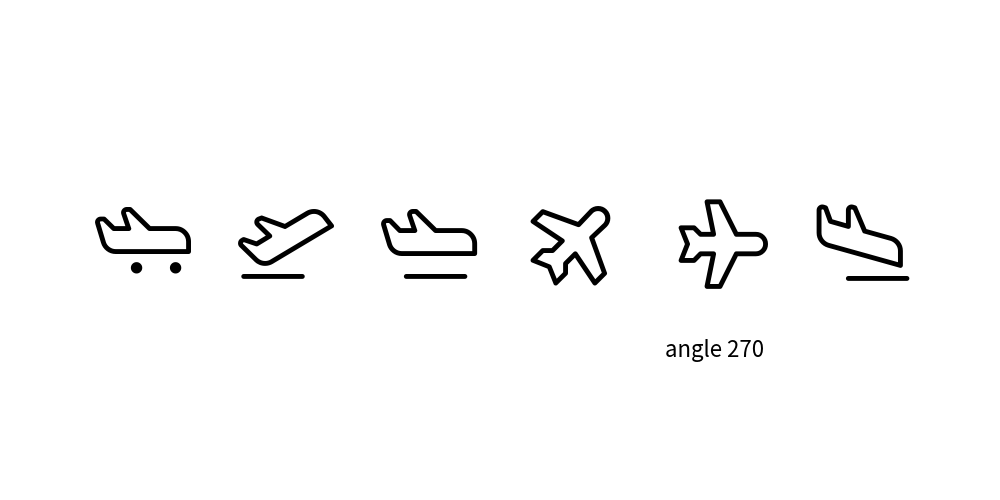
Executing this code yields the following image:

icon_phosphor’s icons
You see lots of variation of only airplane.
icon_phosphor has around 1500 icons.
icon()
icon() is a versatile function for displaying font icons.
Internally, icon modules utilize icon().
The function arguments are:
xy: Coordinates for positioning the icon.width: Width of the icon.code: Font code representing the icon.file: Font file used for rendering the icon.angle: Angle for rotating the icon (optional).style: Additional style configurations (optional).
Let’s explore its usage with FontAwesome Free:
 1from drawlib.apis import *
 2
 3width = 100
 4height = 50
 5config(width=width, height=height)
 6
 7file_brand = "fontawesome-free/brands.ttf"
 8file_regular = "fontawesome-free/regular.ttf"
 9file_solid = "fontawesome-free/solid.ttf"
10
11google = "\uf1a0"
12gmail = "\uf0e0"
13google_map = "\uf3c5"
14google_drive = "\uf3aa"
15google_play = "\uf3ab"
16google_pay = "\ue079"
17
18x = width / 7
19y = height / 2
20icon(xy=(x, y), width=10, code=google, file=file_brand)
21icon(xy=(x * 2, y), width=10, code=gmail, file=file_regular)
22icon(xy=(x * 3, y), width=10, code=google_map, file=file_solid, angle=270)
23text(xy=(x * 3, y - 10), text="angle 270")
24icon(
25    xy=(x * 4, y),
26    width=10,
27    code=google_drive,
28    file=file_brand,
29)
30icon(
31    xy=(x * 5, y),
32    width=10,
33    code=google_play,
34    file=file_brand,
35)
36
37
38save()
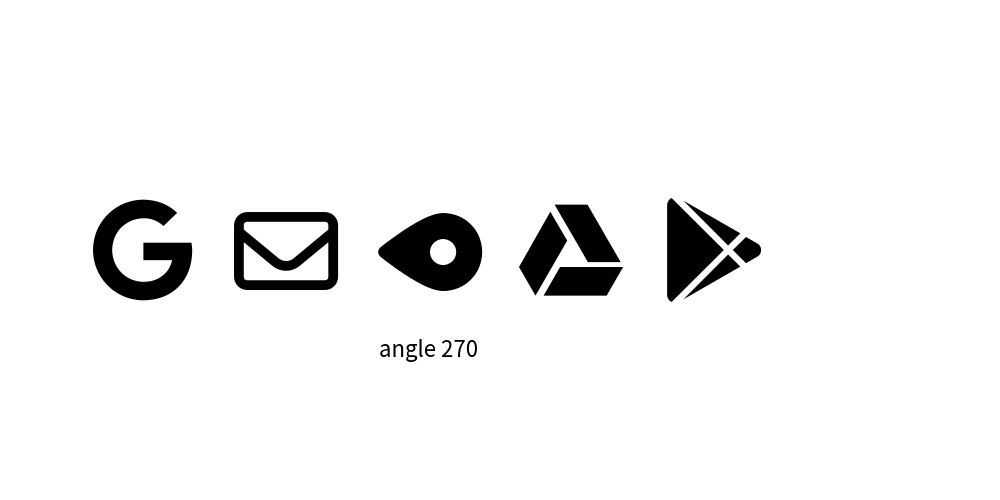
Executing this code generates the following image:

FontAwesome-Free icons
While FontAwesome is widely recognized, its full usage requires a commercial license. The free version may lack variation and style consistency. Therefore, drawlib does not currently provide an icon module for it.
IconStyle
Similar to other drawing elements, the appearance of icons can be customized using the IconStyle class, which allows you to control:
IconStyle encompasses these attributes
halign: Horizontal alignmentvalign: Vertical alignmentstyle: Icon style, Supports"thin","light","regular","bold", or"fill". The availability of styles depends on the icon modules.color: Icon color, specified in RGB (0255, 0255, 0255) or RGBA (0255, 0255, 0255, 0.0~1.0). You can utilize helpers likeColorsandColors140.alpha: Icon transparency, ranging from 0.0 to 1.0, where 0.0 represents total transparency.
Let’s illustrate this with an example:
 1from drawlib.apis import *
 2
 3width = 100
 4height = 50
 5config(width=width, height=height)
 6
 7x = width / 7
 8y = height / 2
 9icon_phosphor.airplane_taxiing(xy=(x, y), width=10, style=IconStyle(color=Colors.Red))
10icon_phosphor.airplane_takeoff(xy=(x * 2, y), width=10, style=IconStyle(style="thin"))
11icon_phosphor.airplane_in_flight(xy=(x * 3, y), width=10, style=IconStyle(style="bold"))
12icon_phosphor.airplane_tilt(xy=(x * 4, y), width=10, style=IconStyle("fill"))
13icon_phosphor.airplane(xy=(x * 5, y), width=10, style=IconStyle(halign="left", valign="bottom"))
14circle(xy=(x * 5, y), radius=0.5, style=ShapeStyle(fcolor=Colors.Red, lcolor=Colors.Red))
15text(xy=(x * 5 + 5, y - 10), text="align left,bottom")
16
17save()
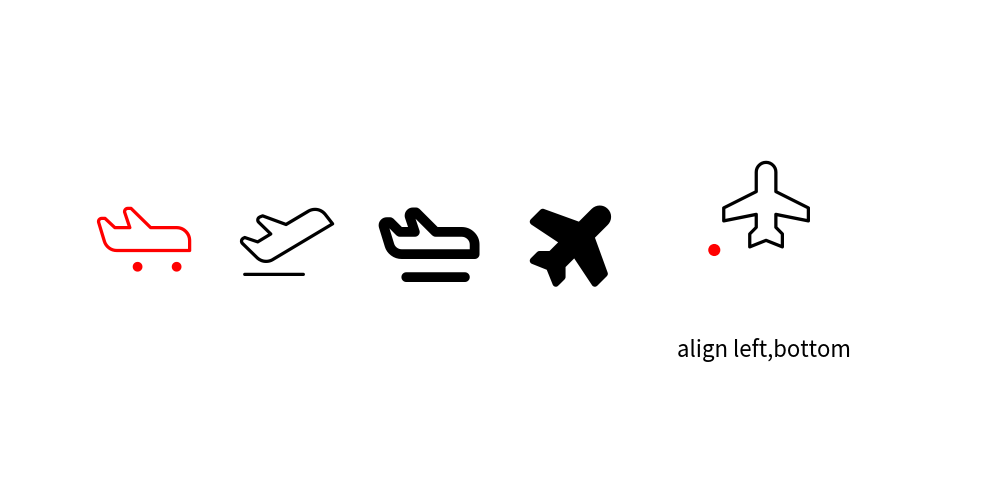
Executing this code generates the following image:

icons with IconStyle.
Pre-defined icon styles
Drawlib’s theme provides pre-defined icon styles. You can specify them by names.
Here is an examples.
 1from drawlib.apis import *
 2
 3width = 100
 4height = 50
 5config(width=width, height=height)
 6
 7x = width / 7
 8y = height / 2
 9icon_phosphor.airplane_taxiing(xy=(x, y), width=10, style="green")
10icon_phosphor.airplane_takeoff(xy=(x * 2, y), width=10, style="red_light")
11icon_phosphor.airplane_in_flight(xy=(x * 3, y), width=10, style="blue_bold")
12icon_phosphor.airplane_tilt(xy=(x * 4, y), width=10, style="green_flat")
13save()
Icon supports the following styles exclusively:
weight of icon:
lightandboldfill color:
flatcolor of icon
Line style solid and dashed are not supported.

icon with theme’s style